With these few lines you get an evaluation of your profile sizes and the AppData, if you have redirectet this to a share. The script is designed to check multiple shares. You only have to adjust the array “$ProfileFolders” and if necessary the variable “$folder1, $folder2”
You can just Use the Scriptblock below to Check if there are Differences between the ” *DesktopGroupName* _Direct” (Storefront) and the “*DesktopGroupName*_AG” (Netscaler).
You only have to adjust the first two variables (lines 3 & 4), it’s easier than the description of Citrix article. If there are differences, you can clean them up, unless these differences are deliberately set that way. Then you have to configure this via Powershell and you can’t customize it in the Studio console.
The second reason for this Issue has no solution except to configure the access only with Powershell, but it’s still nice to know why the Probleme is caused.
I was able to test the problem in two Citrix environments (version 1811 aka Citrix 7.20) and reported it to Citrix. Let’s see if anything is done about it, as already said, the workaround is Powershell.
Cause: The problem occurs when the ExcludeFilterEnabled attribute is set (the value equals ‘True’). The attribute can only be set trough Powershell and the error described above (according to the print screen) is displayed.
The filter is automatically set to True if you have a user or group in the ‘ExcludedUsers’ property. So the rule is, if you make exclude Filter, you control the BrokerAccessPolicy in Powershell. By the way, you can get the Policy in Powershell:
Sometimes the HostedMachineID of Citrix does not match that of VmWare. This is often the case when cloning or moving machines. In Citrix Studio you will see the Powerstate of this machines as unknow and you can’t do any VM actions like reboot in the console.
With this script snippet it can be checked. To do this the variable “Broker” must be adjusted in the Script and the PowerCli and CitrixModule (BrokerSnapIn) must be loaded. Furthermore, the connection to the vCenter must be initiated via “Connect-VIServer vCName“.
#25.09.2019by J.Kühnis - Verfiy HostedMachineID with VmWare ESXi Hypervisoer

$Broker = "Enter your BrokerName"
$Brokermachines = Get-BrokerMachine -AdminAddress $Broker | Select MachineName,DNSName,HostedMachineID

Foreach ($Machine in $Brokermachines){
    IF(get-vm $Machine.DnsName -ErrorAction SilentlyContinue){
        IF($Machine.HostedMachineID -eq (Get-View -id (get-vm $machine.DNSName).id).config.uuid){
            Write-Host $Machine.DnsName "HostedMachineID is matching" $Machine.HostedMachineId -ForegroundColor Green
        }Else{
            Write-host $Machine.DnsName "Mismatch ID: VmWare UUID =" (Get-View -id (get-vm $machine.DNSName).id).config.uuid "; Citrix HostedMachineID =" $Machine.HostedMachineID -ForegroundColor Yellow
        }

    }Else{
        Write-host $Machine.DnsName "MachineName not Found on ESXi" -ForegroundColor Yellow
    }
}
Now that the machines have been read out, the connections can be fixed.
vCenter Cert thumbprint update:
# Open an admin POSH console, load the Citrix Modules (asnp citrix*) and cd to XDHyp:/Connections and run ls. Check the SSLThumbprints entry.
asnp citrix*
cd XDHyp:/Connections
ls
On the fly, I found no way to check which PVS servers & service are online. This is especially important if I want to issue PVS commands from Remote / Orchestrated. Enclosed I have made a small script block to check this. It is certainly not the best way, but it works. One possibility would be to retrieve the status of the PVS-services, but it is unclear whether one can actually connect to the servers trough PVS commands.
#by JKU 09.08.2019
$error.clear()
$k.clear()
$PVSConnectionServers.clear()

$PVSConnectionServers = @("PVS-Server01", "PVS-Server02")

$k = 0
Foreach($PVS_Server in $PVSConnectionServers){
    Set-PvsConnection $PVS_Server
    if($Error -match $PVS_Server){
        #Check Next Server
        $k++
        IF($k -eq $PVSConnectionServers.Count){
            Write-Warning "ALL PVS Servers are not reachable, stop script! $PVSConnectionServers"
            Return
        }
    }Else{
        Break
    }
}

Write-Host "Connecting to $PVS_Server"
The problem is unfortunately still current it just brings some changes with Microsoft Server 2016. Therefore I took the liberty to copy some explanations from the “old article”.
Problem Description
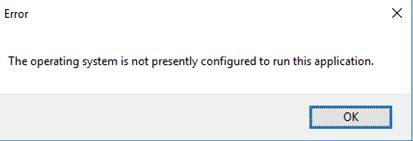
During a recent application implementation project, we ran into the following issue. Some App-V applications, which were installed locally in the PVS image, were unable to start or they were throwing various error messages. One of the applications which were showing errors, was MS Office (Word, Excel, Powerpoint) viewer. The error thrown at startup of the application was the following: “The operating system is not presently configured to run this application.”
The App-V client was 5.0 SP2, but App-V 5.0 SP3 was also used as a troubleshooting step. The PVS target devices were configured as such: Streamed disk Persistent disk (flush overflow) Re-installing the application in the image, solved the issue for that particular application. However, we wanted to know the root cause of this issue, so we logged a case at Citrix. This was done because the behavior was not existing on a regular non-streamed VM. After extensive troubleshooting together with Citrix support we discovered the root cause: One of the registry keys (HKLM\SOFTWARE\Microsoft\AppV\MAV\Configuration\Packages\<package ID>) containing the PackageRoot value contained a faulty HarddiskVolume number. This volume was indicated as 3, whereas the streamed disk volume number was 2.
Solution
Correcting HarddiskVolume3 into HarddiskVolume2 did solve the issue. The reason why the HarddiskVolume3 value got into the registry was because these applications where installed in the image on the template machine. This was the machine from which the initial vdisk was captured. During the installation of the particular App-V applications, the original disk was still attached .
This is issue is definitely not Citrix or PVS related, but can be encountered on such a setup. To prevent this issue from happening again in the future, the original disk was detached from the template VM.
You can get the disknumber in CMD with “DISKPART -> ListDisk” or PowerShell “Get-Disk”.
My expirience and solution with this issue on Server 2016:
In our Environment we ran into the same problem and we could fix this on Server 2008R2 & Citrix 6.5, PVS 7.15 with the modification of one of the registry keys (with a Startupscript during worker boot). (HKLM\SOFTWARE\Microsoft\AppV\MAV\Configuration\Packages\<package ID>) containing the PackageRoot value contained a faulty HarddiskVolume number.
On Server 2016 (Citrix 7.17) everything was useless. Creating or deleting a disk on the masterimage or changing the RegKey didn’t work. I also didn’t find a way to change the disk volume number.
The problem
could only be solved by adjusting the call parameter of the application. If the
application is started in the App-V context it works fine.
Add-PSSnapin : Cannot load Windows PowerShell snap-in McliPSSnapIn because of the following error: The Windows PowerShell snap-in module C:\Program Files\Citrix\Provisioning Services
Console\McliPSSnapIn.dll does not have the required Windows PowerShell snap-in strong name McliPSSnapIn, Version=7.13.0.13008, Culture=neutral, PublicKeyToken=null.
With this script one or more servers can be deleted from the Citrix DeliveryController (Citrix Studio) and from the ESXi/vCenter.
To use The Script some variables and values need to be adjusted like the name of the Citrix DeliveryController and vCenter. Vmware (PowerCLI) and Citrix (SDK) powershellmodules need to be installed.
This only works if the VM name is identical to the Worker Server DNS name. If this is the case, the following string can be deleted in the script [-replace “.FQDN.address”,””]
In my case, the name of the VM is only the “hostname” of the machine and not the DNSname. So the script removes the FQDN name, in order to use the script successfully, this must also be adjusted.