Here is an example how you can use the REST API on the BluecatDNSServer to query data via the workflow interface (alternatively you could use its API directly). I am sure that you can use this concept for other web interfaces.
The script is a translation of a CURL request. It shows how to query the token and use this “BASIC Token” for further queries.
#BY J.Kühnis
#Invoke Webrequest/RestMethod to get IP Adress & Mac-Adress from Bluecat API
#translation of CURL Commands

############################
#   CURL sample
#
#Get TOKEN
#curl -k https://URL/rest_login -X POST -H "Content-Type: application/json" --data "{\"username\":\"your USERNAME\",\"password\":\"your USERNAME\"}"
#
#GET Request:
#curl -k https://URL/get_ip_infos/get_ip_infos_endpoint -X GET -H "auth: Basic ****SOME TOKEN****" -H "Content-Type: application/json" --data "{\"host\":\"SERVERNAME\"}"
#
#
#result:
#{
#  "ip": "some ip",
#  "mac": "some mac"
#}
############################


#Trust SelfSigned SSL/TLS Channel
add-type @"
    using System.Net;
    using System.Security.Cryptography.X509Certificates;
    public class TrustAllCertsPolicy : ICertificatePolicy {
        public bool CheckValidationResult(
            ServicePoint srvPoint, X509Certificate certificate,
            WebRequest request, int certificateProblem) {
            return true;
        }
    }
"@
[System.Net.ServicePointManager]::CertificatePolicy = New-Object TrustAllCertsPolicy


#Generate Web Token (Basic Token)
Function Get-WebTokenBasic{

    [CmdletBinding()]
    Param(
    [Parameter(Mandatory = $true)][string]$Username,
    [Parameter(Mandatory = $true)][string]$Password
    )

$json=ConvertTo-Json (@{"username"="$Username";"password"="$Password";})
$token = (Invoke-WebRequest -Uri "https://URL/rest_login"  -Body $json -ContentType "application/json" -Method POST).content | Out-String | ConvertFrom-Json

$token = $token.access_token
$global:headers = @{auth="Basic $token"}

}

#Get IP or Mac from Servername
Function Get-DNSBluecatValues{
[CmdletBinding()]
Param(
    [Parameter(Mandatory = $true)][string]$ServerName

)

$json4= (@{"host"="$servername";}) | ConvertTo-Json

Try
{
    Get-WebTokenBasic
    $result = Invoke-WebRequest -Uri "https://URL/get_ip_infos/get_ip_infos_endpoint" -Headers $headers -Body $json4 -Method Post -ContentType "application/json"
    $global:result = $result | ConvertFrom-Json
    return $global:result
}
Catch
{
    $ErrorMessage = $_.Exception.Message
    $FailedItem = $_.Exception.ItemName
    Write-Warning "Failed Authentication or Webrequest"
    Break
}


}
Add-PSSnapin : Cannot load Windows PowerShell snap-in McliPSSnapIn because of the following error: The Windows PowerShell snap-in module C:\Program Files\Citrix\Provisioning Services
Console\McliPSSnapIn.dll does not have the required Windows PowerShell snap-in strong name McliPSSnapIn, Version=7.13.0.13008, Culture=neutral, PublicKeyToken=null.
With this script one or more servers can be deleted from the Citrix DeliveryController (Citrix Studio) and from the ESXi/vCenter.
To use The Script some variables and values need to be adjusted like the name of the Citrix DeliveryController and vCenter. Vmware (PowerCLI) and Citrix (SDK) powershellmodules need to be installed.
This only works if the VM name is identical to the Worker Server DNS name. If this is the case, the following string can be deleted in the script [-replace “.FQDN.address”,””]
In my case, the name of the VM is only the “hostname” of the machine and not the DNSname. So the script removes the FQDN name, in order to use the script successfully, this must also be adjusted.
During the migration from Server 2008 R2 – Citrix 6.5 to Server 2016 Citrix 7.15, the customer had a special request: that the language settings, printer mappings and Outlook shared mailboxes be transferred to the new Server2016/Office 2016 environment. Of course, we don’t want to copy the full Windowsprofile, instead we want only use the most necessary settings to keep the new profile as clean as possible. With the printer mappings and language settings there are so far no problems, all this can be found “relatively simply” in the Registry and taken over (Powershell is your friend).
With the Outlook shared mailboxes it was more complicated…we had in this specific case no possibility to get the relation between the assigned shared mailboxes and the users trough Exchange…the Exchange admin told us that you can’t read the relations with the current Exchangeserver settings.
Although you can technically read the members of a shared mailbox with get-mailbox or a similar command.
Probably you could also mount the shared mailboxes automatically to Outlook…if you like…but honestly, that’s not the point. And i’m not an MS-Exchange professional…😉
You can actually get Outlook profiles/mounted shared mailbox (profiles can be seen under CMD: “c:\Windows\SysWOW64\control.exe mlcfg32.cpl“)from the user registry. It may not be the best way but it works and offers a small advantage. You migrate only those shared mailboxes which the user has assigned to himself in the current Outlook version. You will not randomly migrate all shared mailboxes to the new Outlook environment just because the user is a member of those.
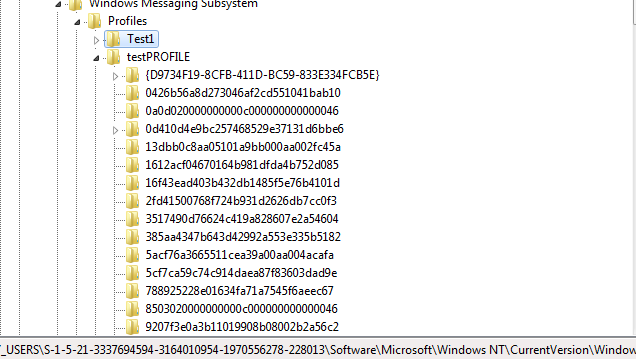
To cut a long story short… What needs to be done now to migrate the mounted mailboxes/profiles from Office 2010/Server2008R2 to Office2016/Server2016? First an export of the Outlook profiles: HKCU\Software\Microsoft\Windows NT\CurrentVersion\Windows Messaging Subsystem\Profiles
Watch your step! This cannot be imported easily…because the path has changed ( Thank you Microsoft!).
New path under Office 2016 (Import to these location): HKCU\SOFTWARE\Microsoft\Office\16.0\Outlook\Profiles
There are a lot of cryptic registry keys but so far the migration and the Outlookprofiles hasn’t caused any problems. Write me in the comments, if you know the specific key’s which are needed to migrate shared mailboxes (so I can make everything a less streamlined and cleaner)…I don’t take this trouble today 🙂
You have to define the $root variable, it can be something like ‘$root = “$env:appdata\Profilmigration7x”‘ or a Network share. If you use the Appdata path, ensure to Copy the data to the “NEW” appdata-path if you use Citrix or another UPM versioning tool.
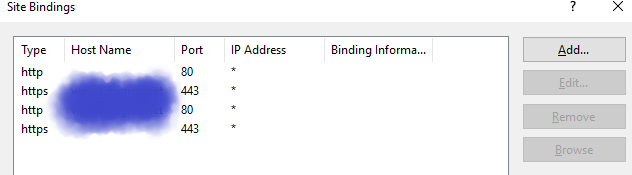
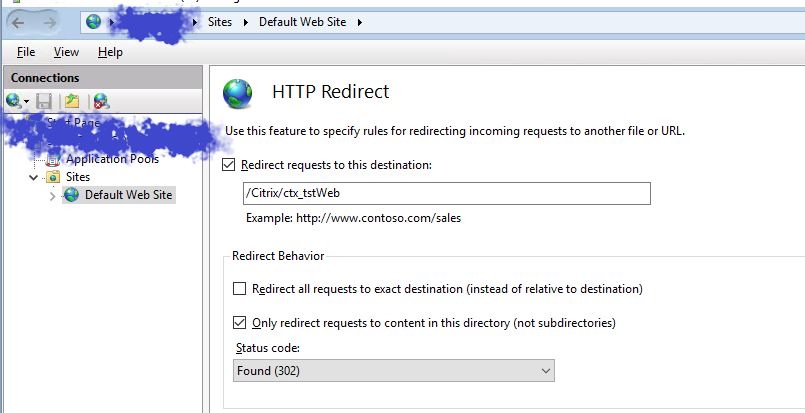
The IIS settings will be not saved. For example, IIS bindings to the default web site or HTTP Redirect entries that were made, will not be imported when you restore the backup ZipFile.
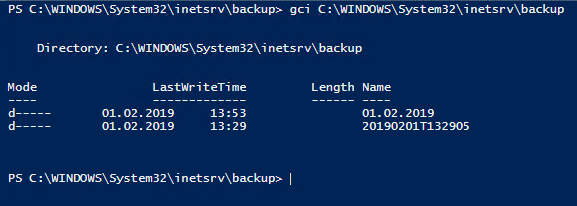
You can also take an IIS Configuration Backup.
Unfortunately, not all settings will be exported from the IIS here either… Therefore I recommend to make a backup of the server (VM Snapshot or similar) another method is to keep an installation documentation about the manual IIS configuration and to recheck the config after a configrestore.